
Unable to share microphone, camera, or screen
Step 1: Make Sure the Host has given Presenter Status
To share a video project the host of the meeting must first make the other participant a "presenter." Once the presenter status has been given, you may share your screen. The steps to share a presenter status are shown below.

Step 2: Check If the Camera is in use by another app
The most common error when accessing the video function occurs when the camera is being used by another application. Please make sure that all applications or browser windows using the camera are closed or the video button is turned off.
Step 3: Check your system settings
3.1 On an Apple MacBook
Launch System Preferences on a Mac by either clicking on the app from the Dock or by clicking the Apple icon from the Menu bar and then selecting ‘System Preferences’.

In System Preferences, select the Security and Privacy option.
If the Lock icon at the bottom left corner is locked, you’ll need to unlock it to make changes to your permissions. For this, click on the Lock icon and enter your Mac’s password/PIN.

Click the Privacy tab on top and from the panel will open on the left side of the screen, click the Screen Recording option.
Check the box adjacent to the browser application that you want to enable for screen-sharing on. (We recommend Google Chrome) After doing this, quit the browser and launch it again.
3.2 On Windows 10 / 11
In the case of Windows 10 or 11, apps should have necessary permissions to share your camera and screen. You will likely need to check your browser settings in step 2.
However, you may wish to still check your settings.
To check this, click the Start menu and then the gear icon (Settings). Go to Privacy. In the sidebar on the left, under "App Permissions" click Camera (or, respectively, Microphone).
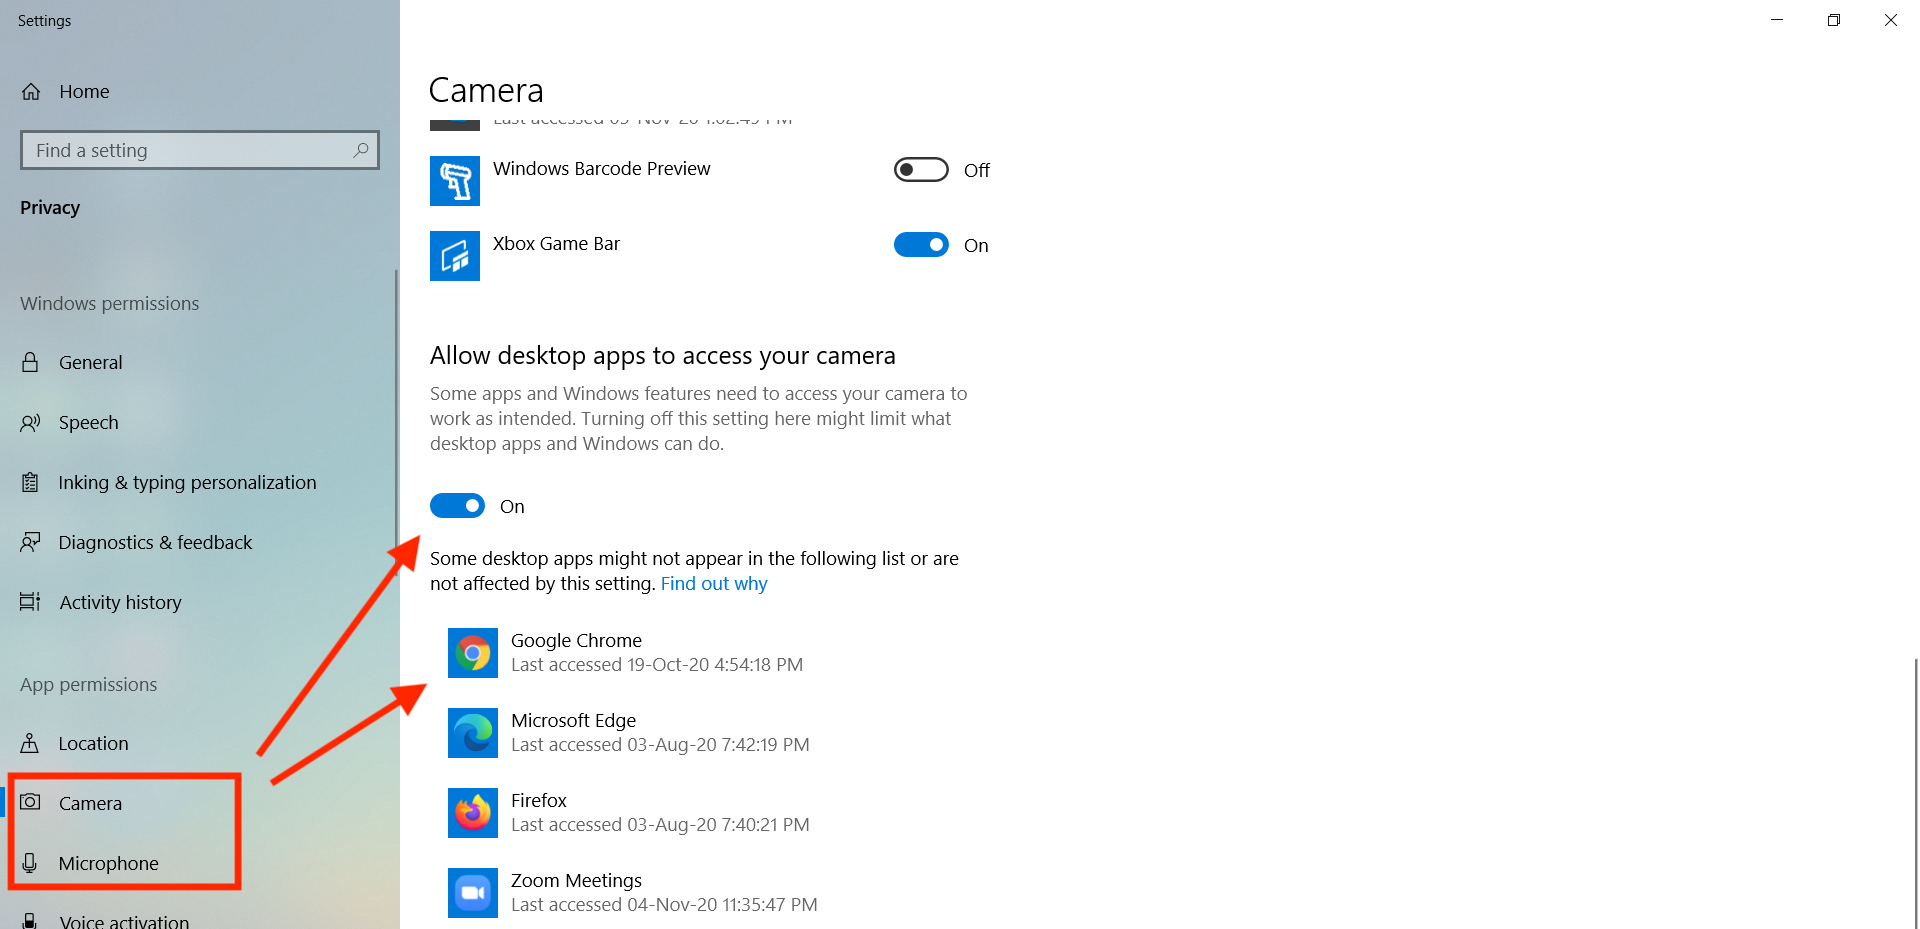
Make sure that "Allow apps to access your camera" toggle is turned on.
Scroll down to the next section, called "Allow desktop apps to access your camera". Your browser should be listed under this section. Just like before, make sure the toggle is turned on.
Step 4: Check your Google Chrome Settings
Although Supervision Assist Live Sessions will work on most browsers, we recommend using Google Chrome*. This is because it is the only browser that supports live transcripts and sharing screen audio. A guide for updating Chrome settings are shown below. You may google search other browser for similar guides.
* Safari is required if using an iPhone or iPad as Apple does not support in browser sessions on Google Chrome.
4.1. Granting permissions in Google Chrome
For microphone and camera, click "Allow" when prompted (one-time, your choice will be saved). If at any point you had hit block for your settings you may need to adjust your settings.
4.2 Accidentally denied or skipped permissions?
You may have accidentally turned off permissions at some point. You can re-enable by following these steps.
- Start or Join a Supervision Assist Live Client Session and try to join with your video.
-
Select the video or microphone icon by the address bar. (If this is not shown, try joining your audio again by relaunching the meeting)

-
Make sure you have "Continue allowing https://session-1.supervisionassist.com to access your microphone." selected. Select Manage button to access more settings.

-
In the settings page you will see a https://session-1.supervisionassist.com available under the Allowed to use your microphone heading. Select the Play icon to adjust more settings.

-
Adjust the settings for Camera, Microphone, and Sounds to be allowed.

Note: You can verify if this works by entering chrome://settings/content/camera in your chrome browser. Under "Allowed to use your camera you should see the following.